Welcome › Forums › Product Questions › Mounting › Second layer, mounting.
Tagged: Chinese mounting
- This topic has 35 replies, 6 voices, and was last updated 8 years, 5 months ago by
 riekjecares.
-
AuthorPosts
-
-
23rd October 2017 at 9:53 am #15857
 riekjecaresParticipant
I just ordered, mountingpaper, i just read that you have to do two layers. How much time has to be between the layers. And is the proces the same? And is it than ready to frame it?
-
4th November 2017 at 3:15 pm #16221
 罗雁 LuoYanKeymaster
Hi Bei Li, you can also try one layer if you use the thick backing paper. Yes, once it is mounted, you can frame it. 🙂 For the natural mounting glue, we will update one more tip. I will send you the link shortly.
-
4th November 2017 at 3:39 pm #16243riekjecaresParticipant
Thank you, maybe it would be nice to have a subject about silk around the painting as well someday.
-
5th November 2017 at 1:08 pm #16266罗雁 LuoYanKeymaster
Mounting silk is the same as mounting painting. 🙂 Therefore, we didn’t write a separate article this subject. If you encounter any problem during mounting, please share your experience with us in the forum! 🙂
-
5th November 2017 at 7:40 pm #16310riekjecaresParticipant
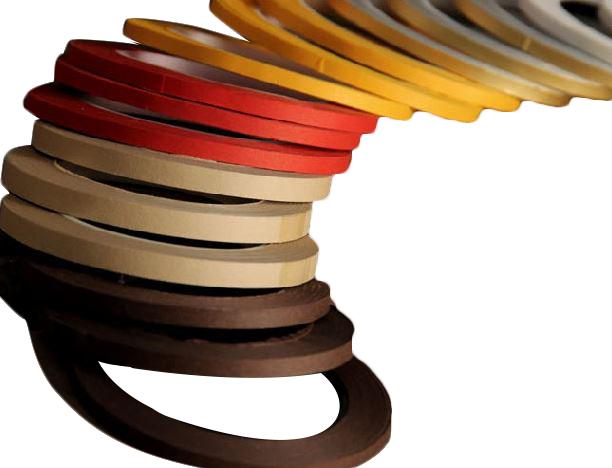
The mounting with the inkston paper worked really good. Now i want to make a silk border around it. I watched youtube how to do this, but wat are the brown straps between the painting and the silk. Is this silk ribbon?
-
6th November 2017 at 10:12 am #16342
-
-
6th November 2017 at 10:55 am #16364罗雁 LuoYanKeymaster
This tape is available on inkston.com now.
-
6th November 2017 at 12:08 pm #16372riekjecaresParticipant
<p style=”text-align: center;”>Thank you, your very helpfull. I wil order it. But i have one more question. On youtube they use it on the back to add tbe silk on to the painting, with a little stripe in between. When i read your information, to hide the mounting edges, this is done on the front i think?</p>
-
7th November 2017 at 4:55 pm #16457罗雁 LuoYanKeymaster
Hi BeiLi, sorry I made a mistake and got corrected today by one Chinese artist in Shanghai. For mounting, if you use thin mounting paper, please try to mount it twice. If you use the thick paper, one layer is enough.
I have not tried to mount twice myself yet because I feel one layer is nice already. However, this artist insists to mount twice *get two layers if you use thin paper. I think we should consider his advice seriously. 🙂 How do you think?
-
This reply was modified 8 years, 8 months ago by
 罗雁 LuoYan.
-
This reply was modified 8 years, 8 months ago by
-
8th November 2017 at 6:52 am #16471riekjecaresParticipant
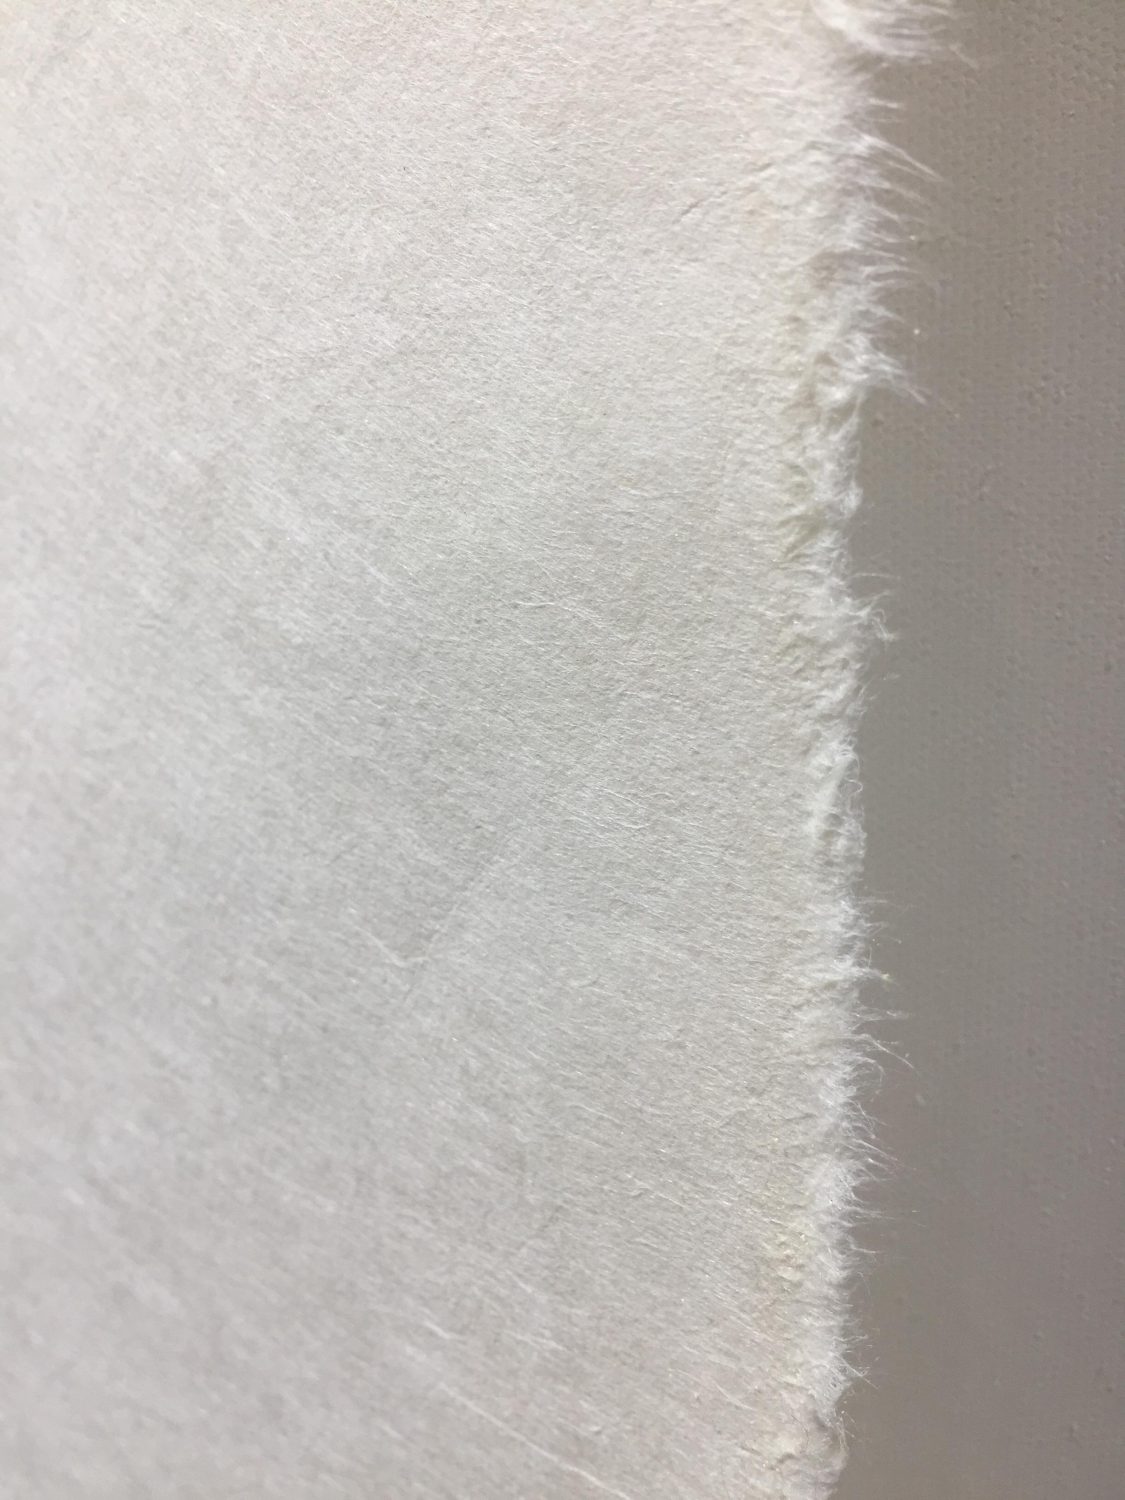
I think 2 layers is the best, i will try it, but after the first layer, the backside is now the smooth side of the paper, wich side of the second layer must be on top now? I put a drawing on facebook about this.
-
15th November 2017 at 11:19 am #16822罗雁 LuoYanKeymaster
Hi riekjecares, after consulting a couple of mounting masters in China, here we got the reply: there is no specific requirement on which side. However, it is quite common to use the smooth side out while keep the rough side in for the painting heart.
I am not sure the reason behind this practice. I have checked some mounted paintings and found the smooth side seems to be on top always.
-
17th November 2017 at 4:51 am #16859罗雁 LuoYanKeymaster
Nice comment from facebook:
Meredith McPherson The rough and smooth sides of raw single xuan can be subtle in their differences. I like to write calligraphy on the smooth side since it allows the brush to move faster and more freely. Wet mounting is basically pasting two pieces of paper together. From a physical perspective, paste will adhere better to a rough texture than to a smooth surface. For that reason alone, I apply wet mounting paste to the back rough side of the painting and adhere the wet mounting paper’s rough side next to the painting’s rough side. That is … rough side to rough side for best adherence. Any other ideas on this?
-
24th November 2017 at 1:19 am #16953
 hanayamaParticipant
Hi
Yes I do think rough-to-rough is ideal, but rough-to-smooth would work too, I think. I also do bookbinding and so work with paste and glue often. My calligraphy is done typically on the smooth side, as I was taught.
Sometimes there is almost no difference between sides of the paper which tells me that I have to ‘test’ each side first if I want to make absolutely sure, but with paper like that, in the end, it doesn’t seem to matter. The same amount of sizing has probably been used on both sides when it was made.
-
25th November 2017 at 10:13 pm #17072
 tibiliuParticipant
Hello!
riekjecares, chinese mounting is a dificult process, it takes years to master. However, with a bit of concentration you can reach good results faster than that. Be sure to read and watch everything available on line about the subject and make test mountings with less important pieces.
About the tapes, they are not mandatory (not among my favorites either). You can read about them here: http://funalliance.com/ink/painting/mounting.htm
-
26th November 2017 at 6:58 pm #17092riekjecaresParticipant
<p style=”text-align: center;”>Thanks for your advice and the link, I read already everything about chinese painting, and watch youtube, there is a lot about mounting, but not a lot about the whole proces, with silk etc. I would love to make a scroll muself.</p>
-
1st January 2018 at 12:23 pm #17539
 charlesrtsuaParticipant
For the final backing (after you’ve backed your work and attached the silk borders etc) should be double-ply xuan (i.e. two layers of sing-ply xuan) or triple if it is a larger work. You can either use double-ply xuan (easier and quicker) or stick two sheets of single together, which can be done at the same time as backing; simply apply paste to the first sheet, then carefully brush on the second on top (you need to be good at alignment to get them both more or less straight on) then apply paste on top after before rolling a sheet of newspaper under the now double-ply xuan and putting to aside to soak up the excess moisture before you use it to back the work.
-
1st January 2018 at 1:21 pm #17555tibiliuParticipant
Happy new year, everyone!
Hi, charlesrtsua!
Could you share some tips about how you paste the “pockets” for the upper and lower rods?
I mean, you are supposed to do it before the final backing. Then the whole thing gets paste, and then the final backing on top, before going to the drying board face down (this time). But you must do something to prevent the pockets from completely sticking to the painting…what do you do? use a little patch of melinex or some other anti-adherent material?
Thanks!
-
1st January 2018 at 3:42 pm #17564charlesrtsuaParticipant
If you mean how to install the lining flaps for the rods onto the two ends of the scroll before the final backing goes on, you first need to cut out two pieces of xuan of the correct width as the scroll width (after you have finished the two side edges off appropriately by either binding with a strip of xuan or folding in, making sure the width is consistent top to bottom), then the appropriate height for heaven and earth rods (e.g. 10cm for the heaven, 25cm for the earth), plus around 0.5-1cm extra for the seam allowance.
Then, fold the two ends of the scroll in towards the face of the scroll, roughly 5cm for the earth, 2cm for the heaven. Then turn the scroll so it faces down, place the fold of one end against the edge of the table. use a plastic sheet and place it around 0.5cm away from the edge to mark the gluing area then apply paste to that said area. Remove the sheet then adhere one edge of the appropriate lining flap of xuan onto this strip of glue. Then you can unfold the part of the scroll flap. Do the same for the other end. After they have dried you can then proceed to back the entire scroll; the scroll flaps would be free and wouldn’t stick to the lining.
-
1st January 2018 at 4:22 pm #17573tibiliuParticipant
charlesrtsua,
After I do what you just said, am I not supposed to put the scroll face down on the table, moist or completely soak with water, remove excess humidity, paste the whole thing (including the pockets), apply final backing, transfer to drying board, face down?
The only time I completed a scroll, at this stage the pockets got sticked to the scroll, underneath the final backing. I had to paste new ones over the final backing to complete the scroll.
-
1st January 2018 at 4:25 pm #17580tibiliuParticipant
I must admit I used Japanese mulberry paper (quite thin) for the whole thing from start to finish…maybe that’s why the paste went through.
-
1st January 2018 at 4:43 pm #17587charlesrtsuaParticipant
Your paste might be too wet, hence why the adhesive seems to seep through a stick the scroll flap to the lining. Here’s what you could do:
1. Fold the flaps down in towards the scroll so the paper side of the flap is not in contact with the paper lining.
2. Do not use the wet backing method and instead use the pile-on (i.e. paste the backing paper instead and then brush it onto the back of the scroll: e.g. https://youtu.be/JIk9zgQF4_Q?t=23m10s).
3. Do not stick it on the drying board face down but face up and make sure the flaps are sticking out. After it dries overnight, take off board, spray wet again, paste the edges then attach facing down.
4. Use a paste not too wet and do not wet the scroll too much.
-
1st January 2018 at 5:41 pm #17594tibiliuParticipant
Thank you, charlesrtsua!
your tips are helpful, especially nr. 2!
I’m a bit uncomfortable with letting out to dry face up, with the flaps sticking up…I fear possible deformations, buckling maybe…of the flaps I mean. But I definitely understand what you say and I will try it!
Also, with the slightly thicker xuan I’ll be able to do tip nr. 2 just fine!
Thank you!
-
1st January 2018 at 6:11 pm #17601tibiliuParticipant
The link seems to be broken…
charlesrtsua, could you provide us with some more links on Chinese mounting, that you find helpful? I think that would make everyone happy and grateful!
-
1st January 2018 at 6:44 pm #17608charlesrtsuaParticipant
Just search ‘裝裱’ on Youtube and you will find some videos of some pros doing mounting. All you need to do is watch carefully what they do and you should be able to work out the details. The video I tried to link to goes under the title of ‘Scroll mounting in Taiwan – part 2 書畫裝裱 – 卷軸’ at 23mins in where the person starts to paste the backing paper to the scroll (though he has also attached a head wrapper as well but the process of pile-on backing is the same).
-
This reply was modified 8 years, 6 months ago by
 charlesrtsua.
-
This reply was modified 8 years, 6 months ago by
-
1st January 2018 at 6:49 pm #17616
 moqiaoKeymaster
this one?
-
1st January 2018 at 7:34 pm #17623tibiliuParticipant
Ah, ok! It never occurred to me to type Chinese! 🙂
And I remember watching this exact video recently! Hi, moqiao! Of course I must give it a lot of time to try to understand what is going on as I don’t speak Chinese.
About an year ago or so there was a channel called “TechenSu” or something that had a series of nine videos with all the stages presented by an old master mounter. For some reason, now only part 2 is available and I can’ t find the channel either, I think they switched to hanzi completely in the name. I hope they took them down to make subtitles! 🙂
-
1st January 2018 at 7:46 pm #17630moqiaoKeymaster
Yes it would be great to have more subtitles… it’s time consuming to do.
to refer to any other videos and links on the forums, just put the link on a separate line and the embedding etc will happen automatically…
-
3rd January 2018 at 12:38 pm #17667tibiliuParticipant
I took some time to watch all the three videos mentioned above by charlesrtsua and moqiao. Amazing that you never see the master use a square for anything! 🙂
There is a little something I don’t understand. In the first video, at about ‘35.00, the mounter cuts and pastes two narrow pieces of paper along the lateral sides of the scroll. Why?
I can only imagine they moisted the scroll, pasted these margins to the table and let it all dry so that the scroll would stretch and flatten before the final backing.
-
3rd January 2018 at 9:05 pm #17674charlesrtsuaParticipant
Those strips of xuan act as a temporary reinforcement attached to the edges so you can allow the scroll to stretch without the backing paper on it. This is especially used for scrolls that use thin silks that tend to contract and expand more than thicker ones such as those containing cotton so need to be pre-stretched and flattened before final backing process etc to avoid wrinkles and creases.
For that purpose, I always keep the trim-offs of the scroll edges as they are double-ply and strong enough not to tear under the forces involved.
-
This reply was modified 8 years, 6 months ago by charlesrtsua.
-
This reply was modified 8 years, 6 months ago by
-
3rd January 2018 at 9:16 pm #17684tibiliuParticipant
Aha! So stretching it was!
And I assume you paste such strips on the upper and lower edges too, so the traction would be from all around the perimeter? Or do the two on the sides suffice?
-
3rd January 2018 at 9:33 pm #17691tibiliuParticipant
You see, at this stage, just before the final backing, I completely soaked the scroll again, to make it flat onto the table, I spread the paste and then attached the final backing. I also neglected to make the pockets slightly wider so I could easily re-open them.
-
4th January 2018 at 11:09 am #17698charlesrtsuaParticipant
You see, you should never apply paste directly to the back of the scroll. Firstly, it will weaken the glue holding the seams together and so if you lift or move it there is danger it will all fall apart, secondly there is danger of making the painting itself bleed and run, third it might weaken the glue holding the backing paper of the silk/painting etc. The key is to avoid getting the scroll too wet; it just needs to be slightly moistened by spraying water over it so the scroll relaxes, the wrinkles and puckering flattens etc so the backing paper can go on flatly on the back.
-
4th January 2018 at 2:35 pm #17705tibiliuParticipant
I understand what you say. My scroll dried nice and flat after the final backing but when I burnished the back the seam between the painting and one of the lateral borders became detached in a spot. I thought it was because I pressed to hard. So, maybe it had to do with the weakening of the glue as you said.
Thank you, charlesrtsua!
-
5th February 2018 at 1:39 am #17201tibiliuParticipant
Riekjecares,
to be honest, I don’t know if the paper tapes are mandatory for the process of mounting. I noticed that sometimes they don’t show on the front (but they might still be there as a means to connect the painting and the borders). I just like it better when they don’t show on the front. The only time I made a scroll I pasted the borders directly onto the painting. I used linen (backed with paper) instead of silk.
I’m also very interested in scroll making and I’m looking forward for more on this on the forum.
I found most useful Henry Li’s videos on Chinese mounting on YouTube, this: http://cool.conservation-us.org/jaic/articles/jaic42-03-007.html
and this: https://www.google.ro/url?sa=t&source=web&rct=j&url=http://cool.conservation-us.org/coolaic/sg/bpg/annual/v20/bp20-07.pdf&ved=0ahUKEwiShe2DueTXAhXCblAKHVhKA64QFggdMAA&usg=AOvVaw2MoPj5DX3G05AJzdXYERio
-
5th February 2018 at 6:21 pm #18095riekjecaresParticipant
Thanks Yan Luo
Nice to see, that my question resulted in so many feedback, I am struggling with my scroll, the silk, roll of the bbackingpaper while mounting. But I keekeep my head up high, …
-
-
AuthorPosts
- You must be logged in to reply to this topic.